
Make me! The Milk Bottle Everlasting Daisy
Or, a gentle reminder to make the most of whimsy

When did you last idly pull the petals from a daisy to play the whimsical game of “Do they love me, Do they love me not?” Why not make a kinetic daisy, no field of daisies required?
As adults we have distanced ourselves from finding simple moments of happy. Circumstances may have changed, but some childhood traditions are worth revisiting.
For me, a regularly practiced childhood state of happiness was to simply lie in the paddocks abundantly flowering in Capeweed daisy, gaze into the blue sky and the drifting loveliness of the clouds and from time to time, when the moment was right, to sit up and lazily form strings of daisies into chains. Repeat.
Similar to the unofficial international Rule of the Dandelion, where it remains mandatory for the finder of a full dandelion clock to blow away the seeds and wish, one is also bound by similar Rules of Childhood to honour the serendipitous discovery of a daisy with the small ritual addressing the eternal quandry of whether the holder of the daisy is the subject of another’s ardour, an especially tempting ritual when suffering the effects of a crush (which to my disbelief and discomfort is not reserved only for the very young).
It is interesting to note the French version is different from the English:
"Ils m’aime un peu – beaucoup – à la folie – passionnément – pas du tout".
(And for the last petal;) "M’aime-t-il ?".
Which roughly translates to:
“They loves me a bit, a lot, madly, passionately, not at all”
arguably a vastly superior version to the plodding English; after all,
in the French version, there are more chances to be loved…
I love to find Oxeye daisies in flower, I pick their blooms from my garden and bring them inside, the simple colour combination of yellow, white and dark green is fresh and clean and a little posy of them popped into a small vase beside my keyboard always lifts my spirits. I leave the daisies whole, but their seer-like potential of the whimsical tradition remains.
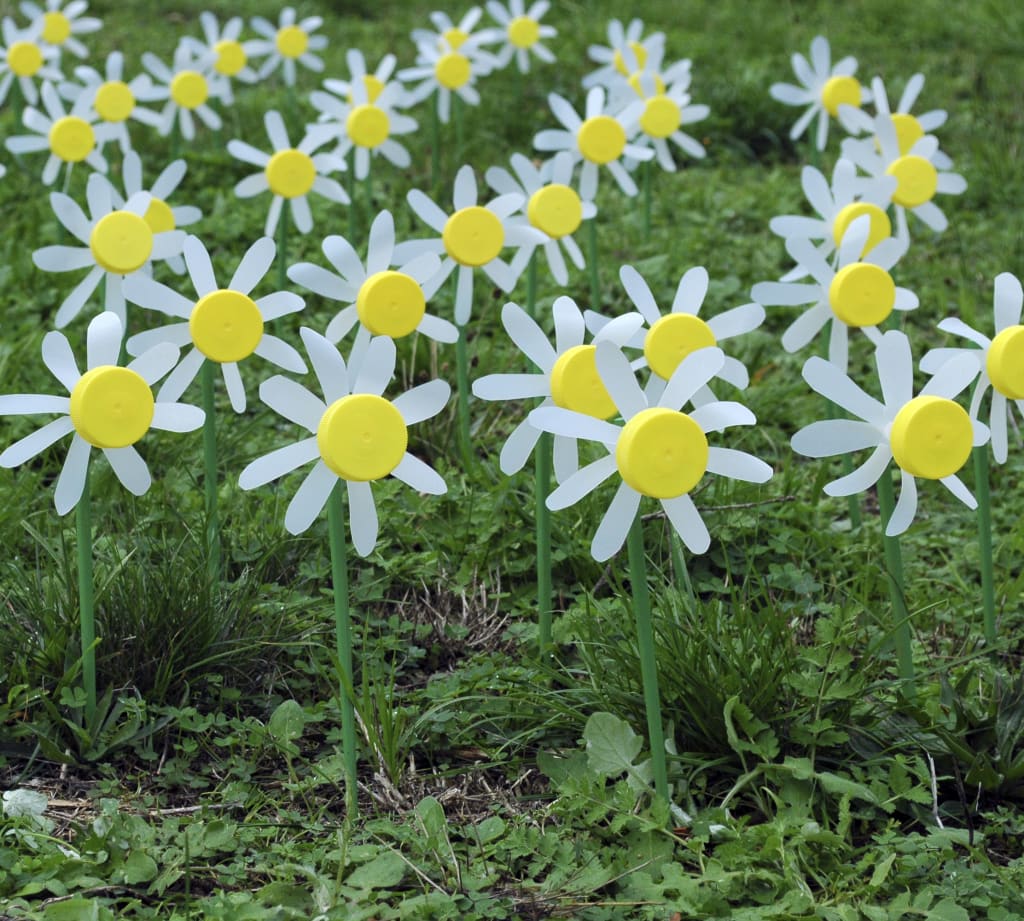
For when the daisies are dormant, I devised a visual homage to the humble daisy, these Milk Bottle Everlasting Daisies spin enchantingly in the wind. An everlasting happiness to plant in your garden or to share with a friend, a reminder of the Childhood Rules that most of us remember in some way or another.
Instructions for the Milk Bottle Everlasting Daisy
Written instructions including photos follow below. The daisy petals are fashioned from milk bottle plastic and incorporate the lid, they are a kinetic creation and catch the wind with their angled petals, in the same fashion as the blades of a windmill.
For the daisy pattern
- pattern (screen capture, re-size image to 10.87 x 10.35cm and print onto plain paper)
- a piece of light cardboard (think cereal box)
- glue stick
- scissors
- standard single hole punch

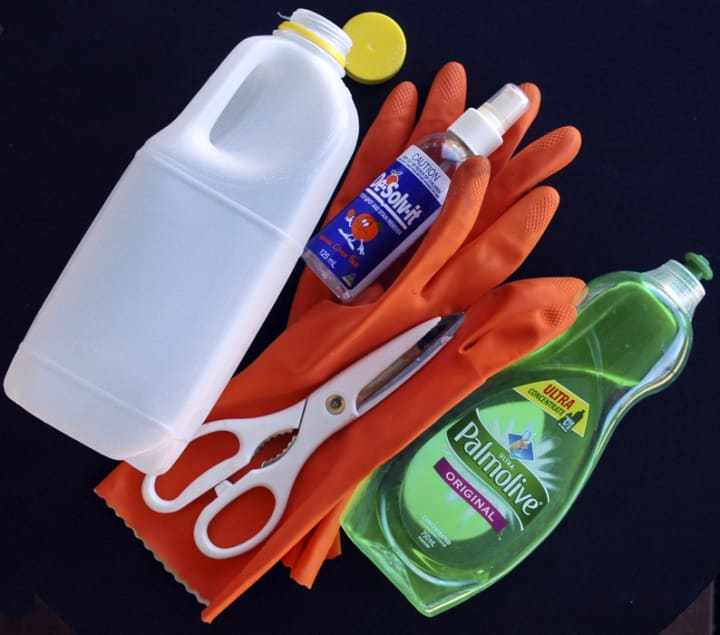
To prepare the milk bottle
- adhesive dissolving liquid (I use de-solv-it)
- rubber gloves
- hot water
- detergent
- kitchen scissors
- an empty 2 litre milk bottle (lid required) or choose a milk bottle with a plastic sleeve and not sticky label
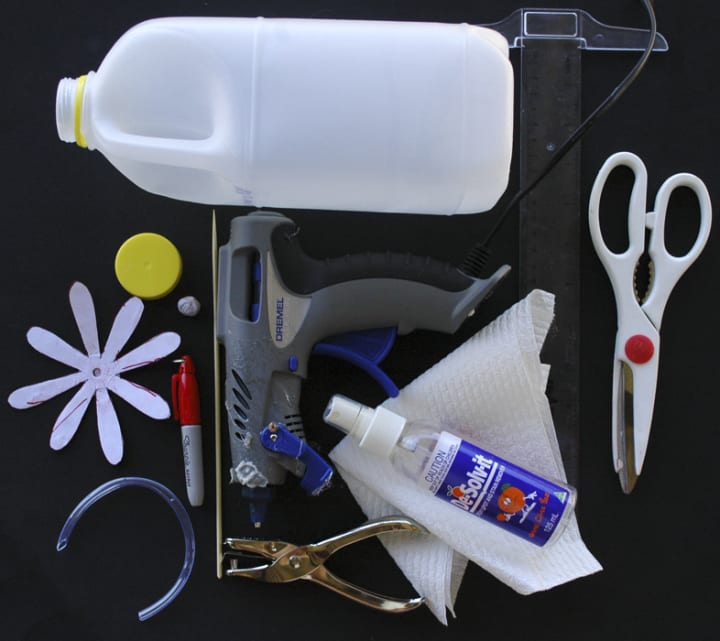
To make a daisy
- milk bottle plastic and handle
- a Sharpie texta for tracing
- a few sheets of kitchen paper to remove the tracing marks made by the Sharpie using de-solv-it)
- a small blob of blu-tack
- standard single hole-punch
- clear plastic tubing 4mm (available in craft stores), 5cm for each daisy
- ruler
- scissors
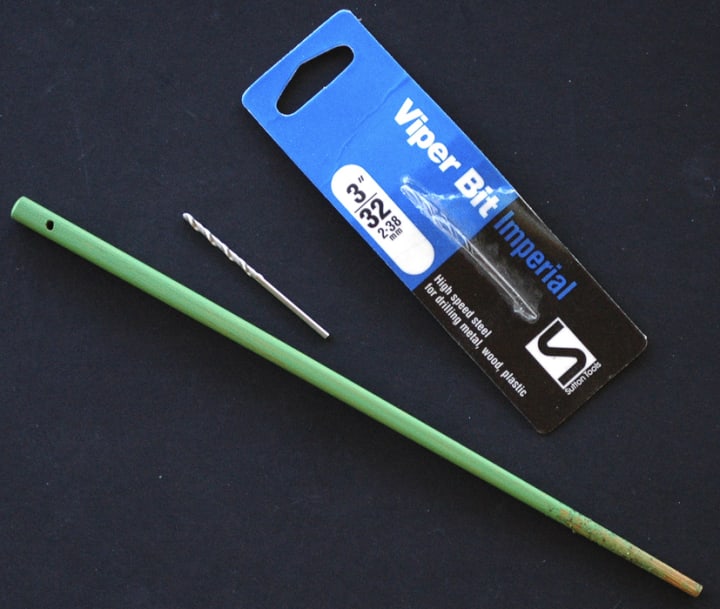
- bamboo skewer cut to a 6.5cm length
- hot glue gun & glue
- the daisy pattern you made earlier
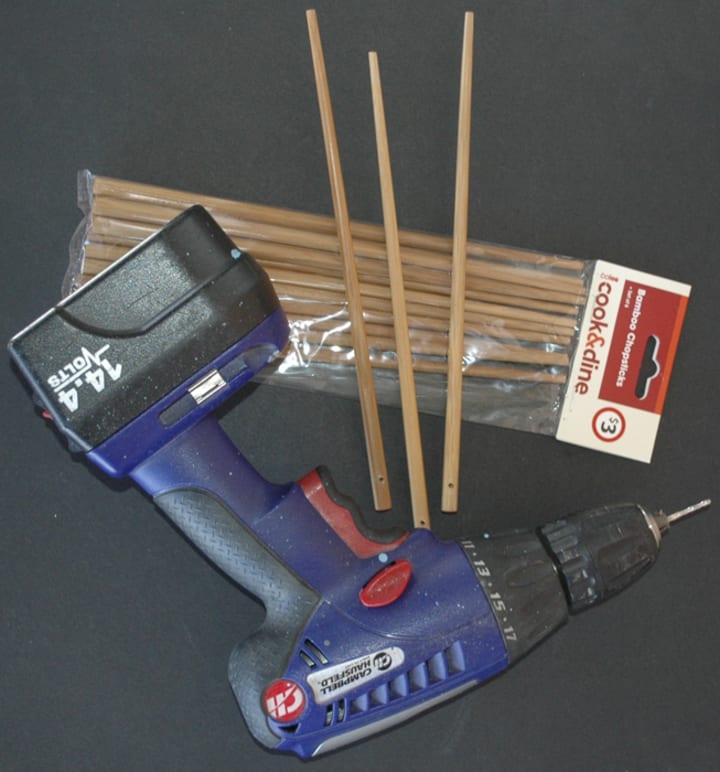
For the stalk
- 1 wooden chopstick
- green paint & brush
- drill bit (viper bit 3” or 2.38mm, high speed steel for drilling metal, wood, plastic)
- electric drill
- small piece of sandpaper (not essential, only for perfectionists)
Once you have prepared all these items, why not make a bunch of Milk Bottle Everlasting Daisies? To help you calculate, you will get 2 daisies from one 2 litre milk bottle.
Preparing the milk bottle
Firstly wash the milk bottle out thoroughly using detergent. Fill the milk bottle with very hot water and wait a few moments. The heat from the hot water will allow you to peel off the labels. Remove the labels and discard. Tip out the water and spray de-solv-it onto the remaining sticky residue. Use your gloves to rub the de-solv-it over the sticky areas. Use a little detergent to dissolve everything and rinse clean. You can also choose milk bottles with a light plastic sleeve which is more easily removable and does not leave a sticky residue.
Cut through the top part of the bottle and down one corner to the base ridge. Cut around the ‘square’ of the base following the ridgeline. Discard the base cut-off. Cut off the top part of the bottle following the upper ridgeline (cut above the line). A long rectangle of plastic should remain. Set this aside. Cut the handle off and set aside. Retain the yellow lid and remove the lids’ inner sealing (the white circle).
Preparing the stem
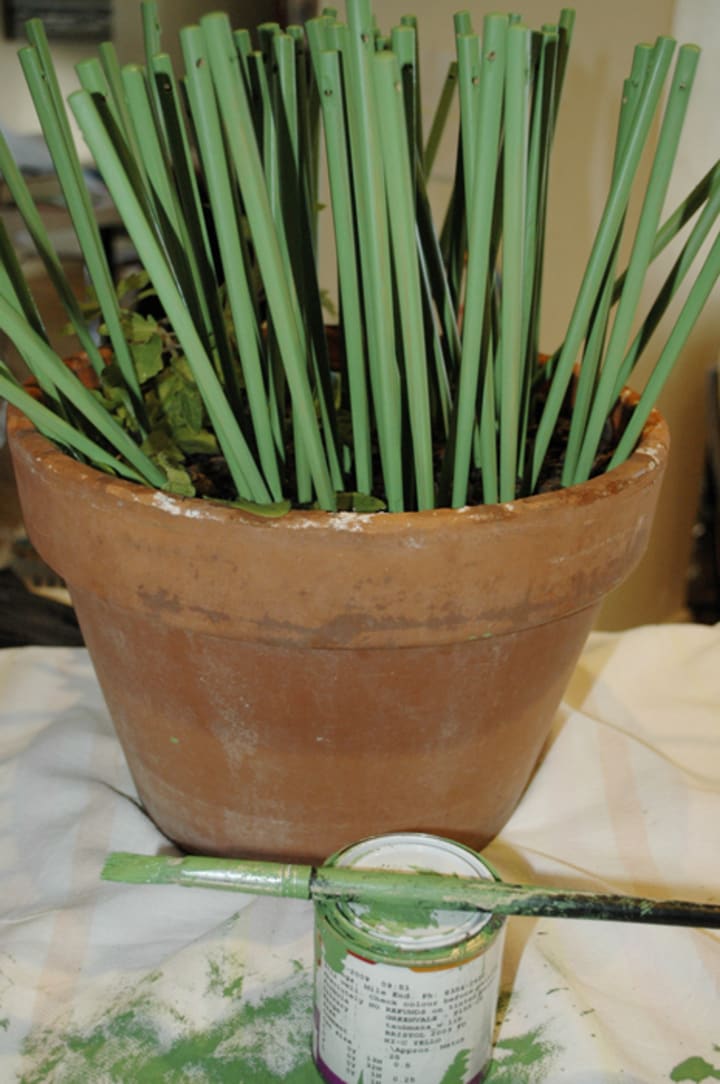
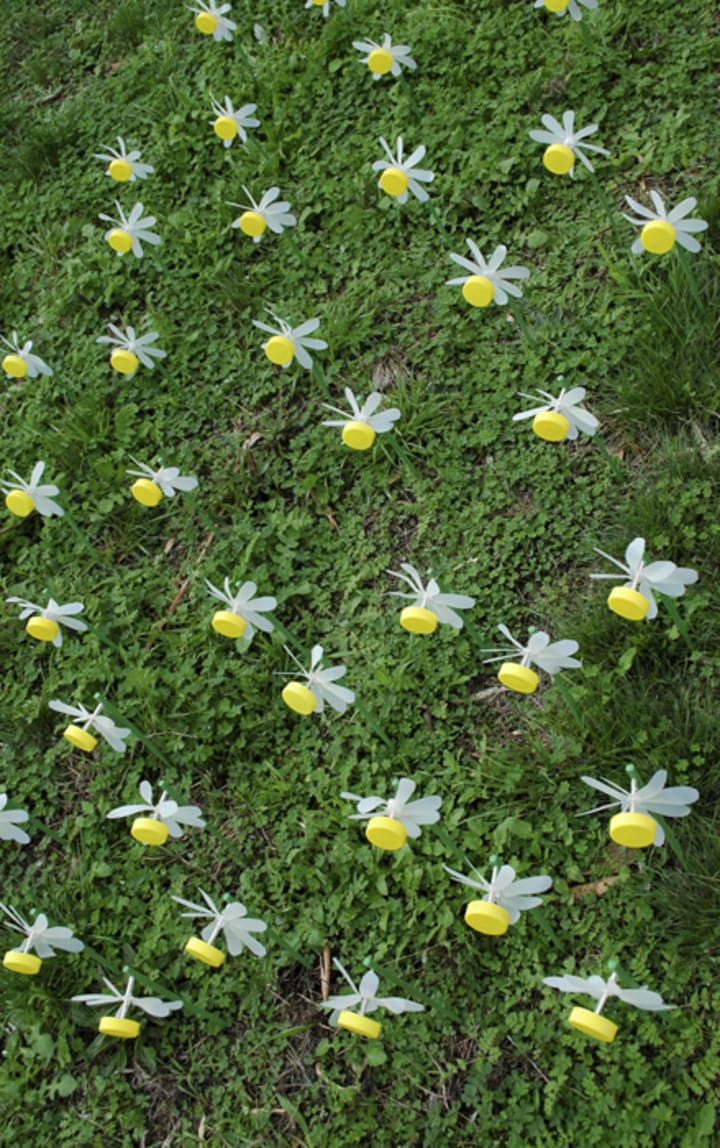
Drill a hole through the chopstick with the electric drill using a 3” (2.38mm) size drill bit. Wiggle the drill bit around a tad to make the hole just a little larger. Sandpaper to remove any jagged edges if you wish. Paint the chopstick green, the bottom tip doesn’t need paint as it will eventually not be seen when the daisy is “planted” in the soil. I let the stem dry by placing it in a pot of soil. You can see I made a batch of around 60 stems all at once. Let the paint dry while you work on the flower component of the daisy.
Preparing the pattern
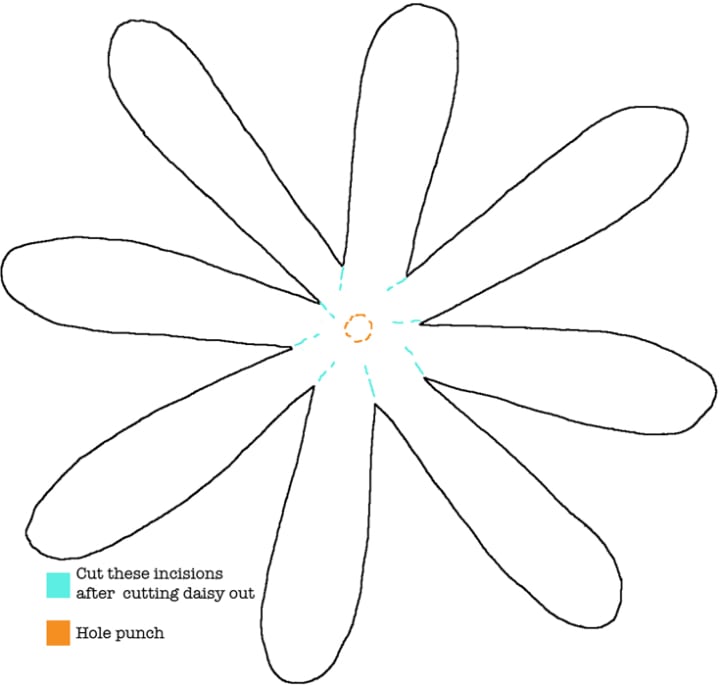
Screen capture, size correctly and print out the pattern. Stick your paper pattern onto the cardboard using the glue stick. Cut out the pattern. Remember to punch a hole in the centre of the daisy pattern where indicated.
the petals
Open out the long rectangle of plastic. Place a small flattish blob of blu-tack on the underside of the pattern and centre your daisy pattern on a flat section of the plastic (that is, not over one of the curved parts that were the corners of the container). Trace out the pattern shape onto the plastic using the Sharpie pen, make a mark onto the plastic through the centre punched hole also. Cut out the daisy carefully. Once the daisy pattern has been cut out from the plastic, punch a hole in the dead centre using the hole punch. Remove any remaining Sharpie marks using the de-solv liquid and wash off any residue with detergent. Dry.
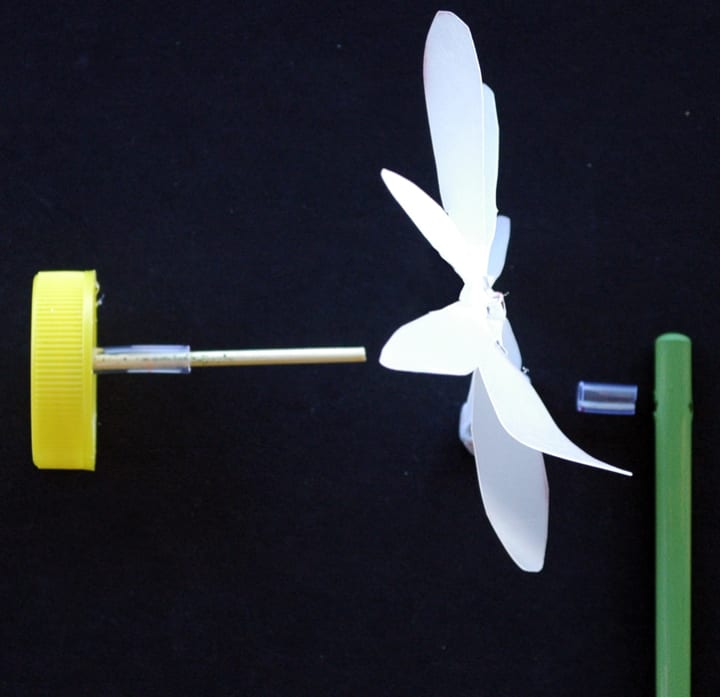
Take the daisy in your left hand and make the small cuts at the angle shown on the pattern at the base of each petal. Heat up your glue gun. Cut a 1cm length of the plastic tubing, slip it through the centre hole of the daisy piece and apply a loop of glue (on one side only) around the tubing’s circumference to secure. Pop the daisy petals piece in the freezer to cool. Note well: Make sure the cuts on the tubing and handle are parallel to each other to create an even height on the sides. If these cuts are uneven, the daisy might have an odd wobble when it turns in the breeze.
Using the milk bottle lid to make the daisy’s yellow centre
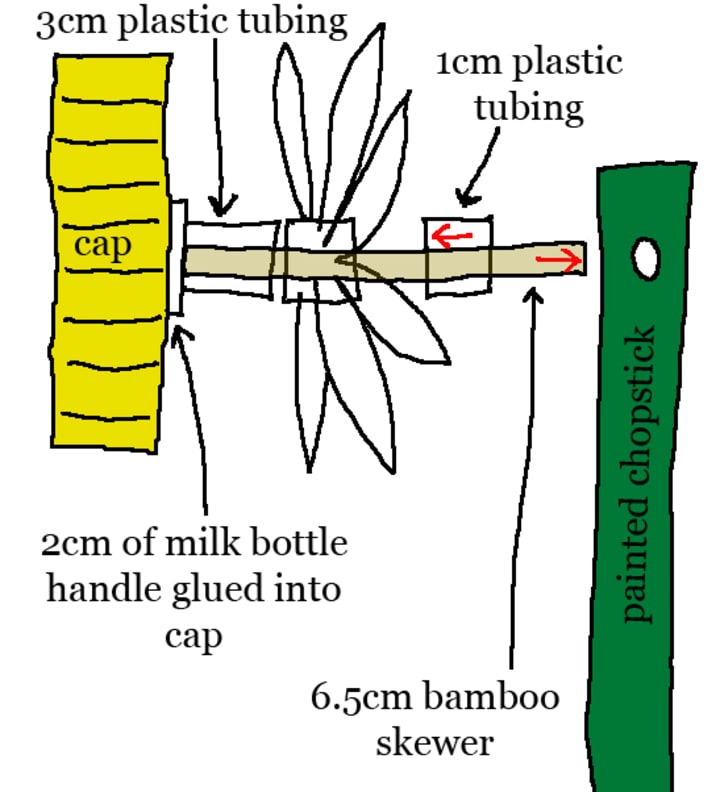
Cut a 1cm length of the plastic handle (use the ruler and the Sharpie pen). Apply a generous amount of hot glue to the centre of the inside of the yellow lid and place the 1cm length of milk bottle handle in the centre. Fill the void in the handle with glue and insert the 6.5cm piece of bamboo skewer. Slip a 3cm length of clear plastic tubing over the bamboo skewer and push down to the base of the skewer. Hold the skewer vertically until the glue has cooled sufficiently for the skewer to remain vertical of it’s own accord and place this component in the freezer to speed up the glue cooling process.
Putting all the pieces together
Retrieve the daisy petal piece from the freezer. Holding the petal piece so the handle side faces you, bend each petal toward you, working your way around until all 8 have been bent in the same way.
Retrieve the stigma (the yellow lidded component from the freezer). Thread the daisy petal piece onto the skewer with the non glued side facing toward the front, after this piece, thread a final 1cm piece of plastic tubing onto the skewer. Hold the stem in your left hand and insert the skewer into the drilled hole, pushing the stigma (the yellow lid) from the front with your thumb. Spin the petal piece around and adjust the skewer, you might need to push the skewer in further or let it out a little (or remove the last 1cm piece of tubing and trim just slightly if it was too tight).
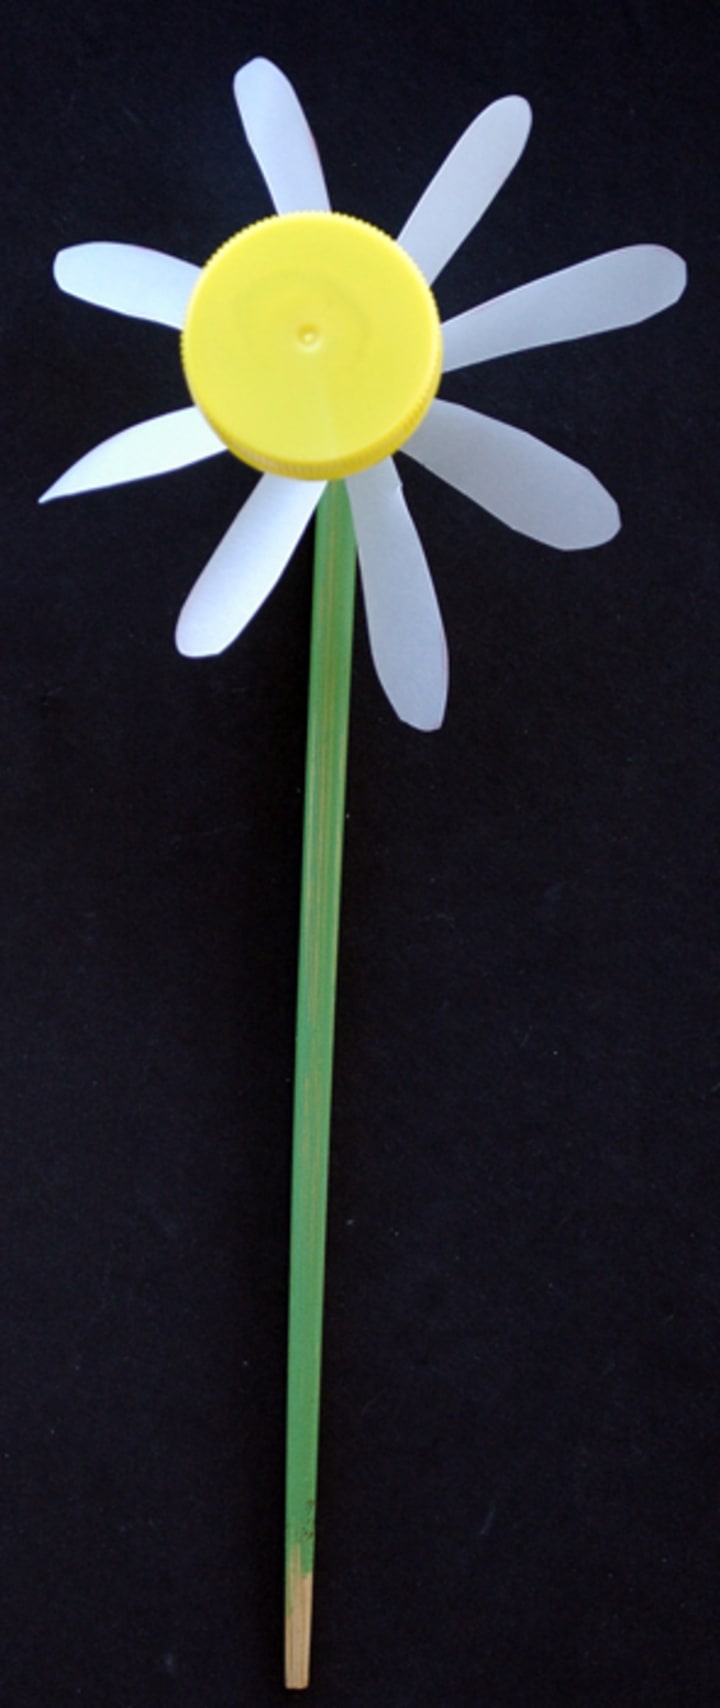
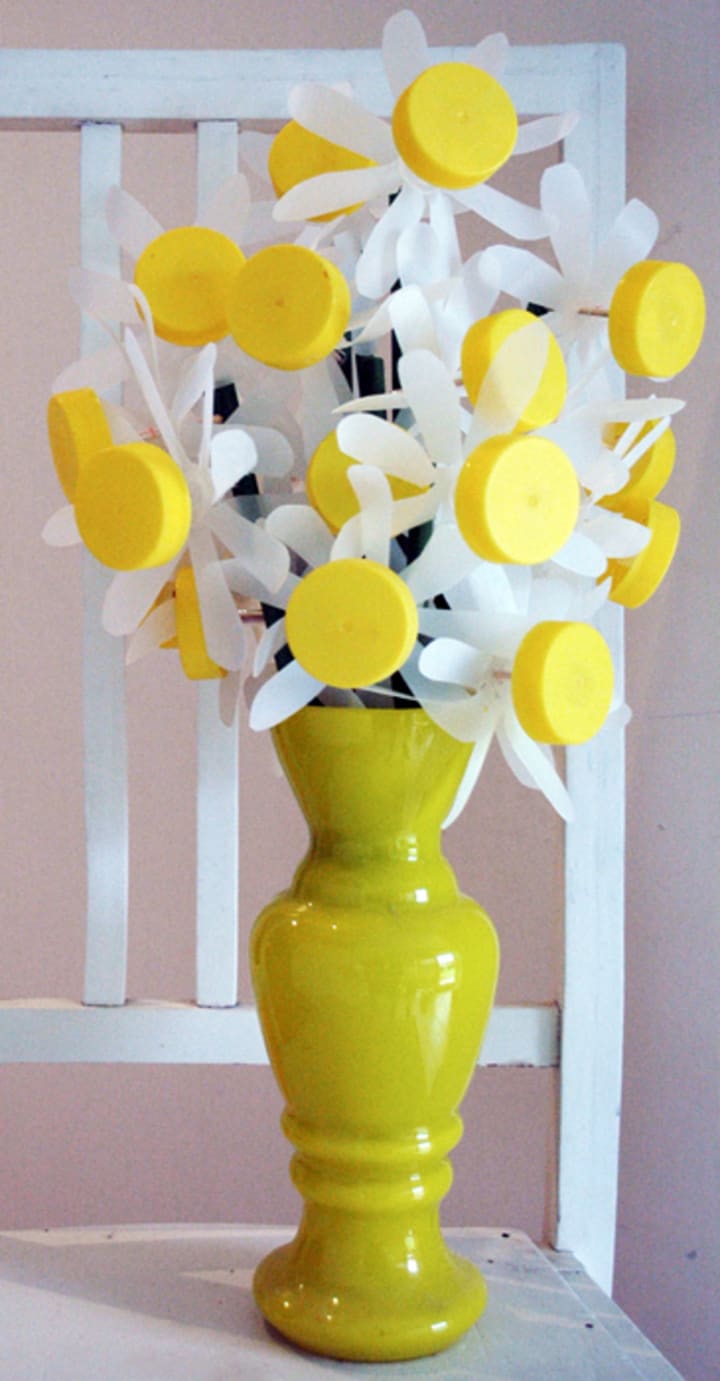
Take your Milk Bottle Everlasting Daisy (or better still, a bunch) outside and “plant”. Wait for a breeze and watch the daisy spin. Happy days!
About the Creator
Lara Jane Townsend
Enjoying the process of creating: the planning, the preparation, the doing and the sharing.
My happy is Creating.Clever.Craft.
Keep reading
More stories from Lara Jane Townsend and writers in Lifehack and other communities.
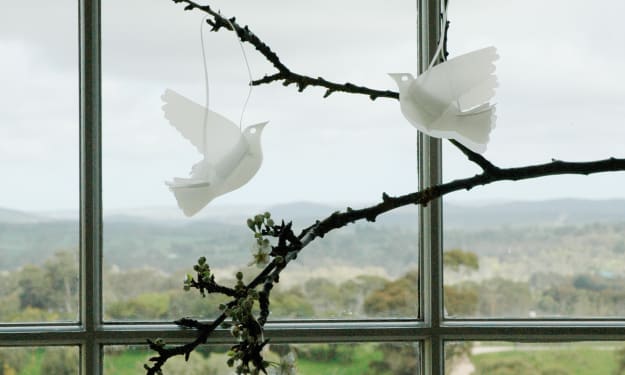
The Milk Bottle Dove Project
May I invite you to consider some different approaches to answer the question of ‘what to make?’ In generations past, hand-crafting skills were honed by necessity. Textiles were expensive so clothes were mended and worn–out clothes were recycled into quilts and rugs. Buttons and zips were unstitched and used in a new dress. Socks were darned, trousers were patched and Dad could fix almost anything around the house with the tools in his shed and the bits and bobs collected and stored in jam jars over the years. A lot of time and energy was devoted to mending and fixing items around the home, not because these jobs were a thrilling creative outlet for the adults of the household, but because they needed to be done.
By Lara Jane Townsend5 years ago in Lifehack
Why Northern Virginia Is One of the Most Mobile Regions in the United States
Northern Virginia is widely recognized as one of the most mobile regions in the United States. Its location near Washington, D.C., combined with a strong and diverse economy, creates an environment where relocation is not unusual but expected. For many residents, moving is a recurring part of life rather than a one-time event. Understanding why this region experiences such constant movement requires looking beyond logistics and into the social and lifestyle factors that shape everyday decisions.
By House Doctor6 days ago in Lifehack
Moving Services in Northern Virginia: Understanding a Region in Constant Motion
Northern Virginia is a region where movement is part of everyday life. Located just outside Washington, D.C., it combines strong economic activity with a wide variety of residential communities. As a result, relocation is not an occasional event for many residents but a recurring stage shaped by work, family changes, and lifestyle decisions. Understanding how this region functions helps explain why moving services play such an important role in daily life.
By House Doctor6 days ago in Lifehack


Comments
There are no comments for this story
Be the first to respond and start the conversation.