
The Use of Timber Veneer in Commercial Fitouts
Learn where timber veneer performs brilliantly, where it fails and why its so popular
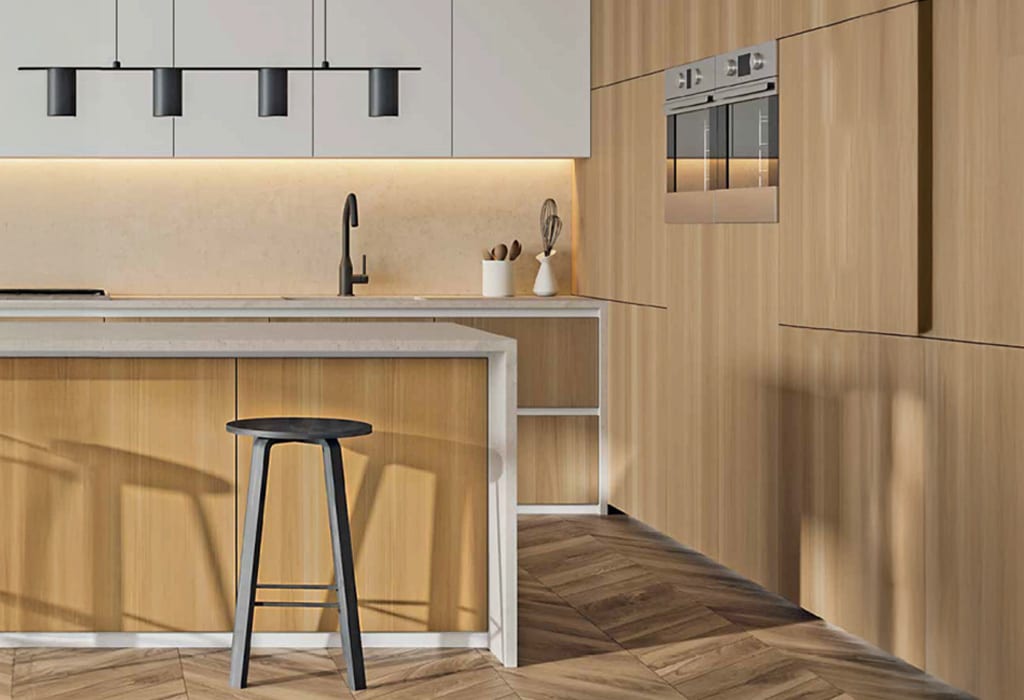
Walk through almost any new workplace, hotel lobby, or education fitout in New Zealand or across the World and you will see it: warm timber grain on joinery fronts, wall panelling, reception desks, and feature ceilings. Veneer is back in a big way, partly because it looks premium, and partly because it lets teams achieve “real timber” character without the cost, weight, and movement risk of solid timber everywhere.
But veneer can also be one of the quickest ways to land a defect claim if it is specified wrong. The material itself is only half the story. The other half is substrate choice, moisture control, and small detailing decisions that determine whether it stays flat, tight, and tidy for years.
Here’s a practical, run-down of where veneer shines, where it commonly fails, and what to draw and specify to keep it out of trouble.
Where timber veneer wins
1) A premium look without a premium thickness
Veneer gives you genuine timber grain and depth, but in a thin face that can be laid over stable sheet substrates. That makes it ideal for vertical applications like wall panelling, joinery doors, and feature elements where the “real material” feeling matters more than heavy-duty abuse resistance. Ultima, for example, positions veneer panels for commercial and residential interiors, with vertical use and light-wear horizontal use as typical applications.
2) Consistency across large areas (when specified properly)
If you need a consistent species look across many sheets, veneer suppliers and panel fabricators can supply sequenced and colour-matched batches, which is often easier than trying to tame solid timber variation. NZ suppliers openly pitch veneer as a practical route to consistency and spec support for larger projects.
3) Sustainability storytelling (with fewer compromises)
Veneer is often chosen because it uses a thin timber face over an engineered core, which can reduce the amount of high-value timber required for a given surface area.
Where veneer fails (and why)
Failure mode 1: Moisture, humidity, and “wet trades still drying out”
The most common veneer failures in commercial fitouts are moisture-related: edge swelling, face rippling, joint peaking, and delamination. In NZ, this tends to show up when joinery goes in while the building is still drying, or when internal moisture loads are higher than expected.
Clause E3 Internal Moisture is explicit about avoiding fungal growth and excessive moisture, with particular attention to spaces like bathrooms and laundries where moisture is generated or accumulates. Veneer itself is not a moisture barrier, so if the internal environment is uncontrolled, veneer will show it.
What this looks like in real life:
- Veneered panels installed tight to concrete slabs that are still releasing moisture.
- Reception desks or wall panels adjacent to entry doors where rain and damp air are routine.
- “Dry” office kitchens and staff rooms that behave like wet areas because extraction is poor.
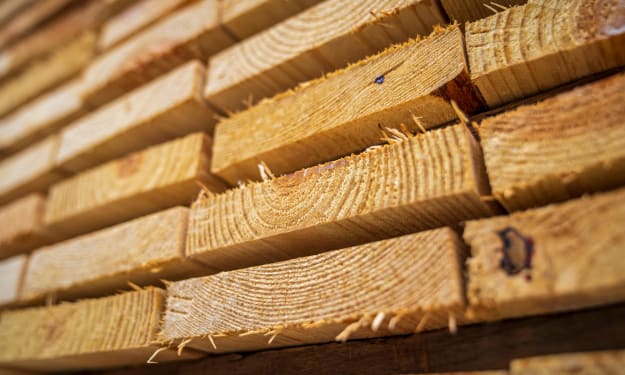
Failure mode 2: Wrong substrate choice (or assuming all MDF is the same)
Veneer is a face. The substrate is what controls stability, screw-holding, fire performance, and moisture tolerance. Many veneer systems are pressed onto different substrates such as moisture-resistant MDF, fire-rated MDF, or plywood, depending on the use case.
If the substrate is underspecified, common problems include:
- Fixings loosening over time on thin or low-density cores
- Edge damage that cannot be repaired cleanly
- Excessive movement where the core is not suitable for the environment
Failure mode 3: Edge detailing that lets water and knocks in
Most veneer defects start at edges: unsealed cut-outs, tight radii on corners, exposed end-grain on edging, or joins placed where people constantly touch.
Common “edge failure” scenarios:
- A veneered return at a reception desk corner with no protection
- Veneer stopping short of a wet zone without a proper termination detail
- Sink cut-outs or cable grommets left with raw edges
Failure mode 4: Fire compliance assumptions
In commercial projects, interior surface finish requirements can be a silent trap. In NZ, interior surface finishes are regulated using Group Numbers, and it is important to remember the NZBC concept: a surface finish is the combination of the visible finish and the substrate it is applied to.
If you specify “timber veneer wall lining” without calling up the tested system (finish + substrate + installation context), you can end up redesigning late, or scrambling for evidence during consent or PS1/PS4 sign-off.
How to detail veneer so it lasts
1) Specify the environment, not just the product
Add a simple performance line to your spec that forces the right conversations early:
- Veneer to be installed only after the building is weathertight and conditioned.
- Moisture levels to be verified before installation (timber and concrete as relevant).
This is the kind of clause that stops veneer being installed while wet trades are still pushing lots of moisture into the building.
2) Match substrate to risk
A quick rule of thumb that works in NZ fitouts:
- Low risk, vertical walls: standard veneered MDF or plywood (as supported by supplier system)
- High touch joinery: specify tougher cores, robust edging, and protection details
- Near wet areas or entry zones: treat as elevated moisture risk even if it is not a “bathroom”
Where a supplier offers veneer pressed to different substrates, select based on the real environment and compliance needs, not habit.
3) Make edges a designed element
Edges are either protected or punished. Consider:
- Thicker real-timber edging where impact risk is high
- Shadow gaps and reveals to keep joins out of the hand zone
- Clear termination details around splash zones and benchtop interfaces
- Sealing requirements for all cut edges, penetrations, and cut-outs
4) Put compliance evidence in the spec schedule
If veneer is used as a wall or ceiling lining in a consented commercial building, ask for:
- Group Number evidence for the system as installed (finish + substrate)
- Any additional fire testing or assessments if the system varies from tested conditions
This prevents the late-stage “we assumed it was fine” panic.
5) Write a maintenance reality check
Veneer is repairable, but it is not magic. Include:
- Approved cleaning products
- A note about abrasion risk on horizontal surfaces
- A plan for high-wear touchpoints (handles, corners, kick zones)
A specifier’s checklist for veneer in commercial fitouts
- What is the substrate, exactly? (MR, FR, plywood grade, thickness)
- What is the internal moisture plan? (E3 areas, ventilation, conditioning)
- Has moisture been measured before install? (timber and slab where relevant)
- Are edges and cut-outs sealed and protected by design?
- Do you have Group Number evidence for the lining system?
The bottom line
Veneer is one of the best tools we have for making commercial interiors feel warm, human, and high-end. It wins when it is treated as a system: substrate, environment, edge protection, and compliance evidence all working together. It fails when it is treated like a decorative sticker you can slap onto any board in any building stage.
If you do the boring bits well, moisture checks, substrate discipline, and edge detailing, veneer will look just as good on handover day as it does on the render.
About the Creator
Keep reading
More stories from Your NZ Local and writers in Journal and other communities.
Big Chains vs Local Timber Merchants in New Zealand
Walk into any timber yard in New Zealand and you will hear the same debate play out sooner or later. Is it better to buy timber from a big national chain, or are local and regional timber merchants the smarter choice?
By Your NZ Local23 days ago in Journal
~ Fired ~
— Ai Intrusion ~ Are you Next ~ Is Ai Evolution after your job? — Few workplaces haven't been affected. Ai is in supermarkets, at doctors' offices, and even monitoring farms. I just can't think of anything this machine is not getting into, can you? For instance: Education ~ Law and Tech jobs will one day have a major influence or be taken over by these inanimate machines, with accuracy and vigor. From mechanics' diagnoses to a wide variety of everyday jobs, including fast food workers, with this input having the ability to cut their unnecessary work hours. I'm certain all of us have been touched by this with our short stories and colorful headings, have you? Even comments are very questionable 'Non-Robot' insertions.
By Jay Kantor26 days ago in Journal
Why Consistency Builds More Trust Than Creativity in Digital Design
A product’s growth and usability depend on strategic UI/UX design, and the interface's familiarity. A familiar interface will be using the same design elements throughout the page to ensure visual, functional, and content-wise consistency.
By Design Studio UI UX7 days ago in Journal
Boundless
A geographical map could take you there. To the places I've been, to the sights I've seen, to the landscapes I've climbed. But no compass could point you in the direction of my memories. To the experiences I've lived, to the happiness I've felt, to the wonder I've held so close to my heart.
By Alyssa Musso4 days ago in Writers


Comments
There are no comments for this story
Be the first to respond and start the conversation.